Tarkov Ballistics Explained: Damage, Penetration, and Armor Damage
The three numbers on every bullet and how penetration is actually decided.
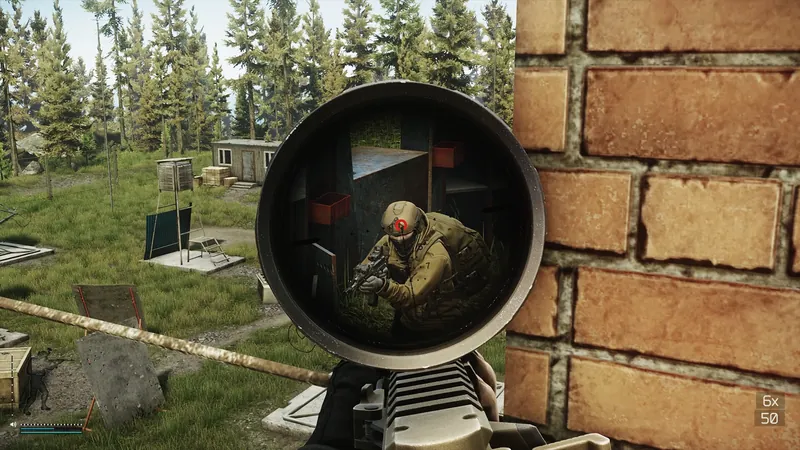
The decision first
Compare damage and penetration separately.
- Compare damage and penetration separately.
- Armor class and remaining durability affect penetration.
- Armor damage describes plate degradation.
- A penetrating hit may lose up to 40% damage.
- Every armor hit removes at least one durability.
- Use the zero-to-six effectiveness scale as guidance.
Choose ammunition for the shot you intend to take
In Escape from Tarkov, the best ammunition is ammunition that can hurt the part of the enemy you can actually hit. A cartridge with enormous flesh damage may accomplish very little against a fresh chest plate. A cartridge built to defeat that plate may deal less damage when it reaches the body. Neither number makes sense without a target, an aiming point, and a realistic expectation of how many accurate shots you can deliver.
For a general-purpose rifle loadout, start with penetration against the armor you expect to encounter, then compare damage and weapon handling. For a deliberate leg-focused loadout, start with flesh damage and your ability to keep hitting exposed legs. For distant headshots, consider retained damage, trajectory, and the protection covering the head. These are three different jobs; trying to solve all of them by sorting a chart by its largest damage number leads to expensive mistakes.
This guide explains the decisions behind those choices. Its named ammunition examples use the site's September 8, 2026 reference snapshot. Treat those figures as dated comparisons and check the linked item references when a balance update changes your usual cartridge. The worked calculations are teaching examples, with their assumptions stated, rather than predictions of an exact live-raid kill count.
Follow the bullet from muzzle to body
Think of a shot as a sequence of interactions. The projectile travels toward the target, potentially losing speed along the way. It may meet scenery or a body part before reaching your intended aiming point. If its path intersects armor, that protection gets a chance to stop it. A projectile that continues can then encounter another protective layer or damage the body part behind it.
This sequence explains why two apparently identical chest shots can produce different results. One may strike a fresh front plate squarely over the thorax. Another may pass through an arm first, hit a different protected zone, or reach an already damaged plate. The ammunition name is the same, but the conditions at the point of impact are different.
When comparing rounds, separate three questions: can the shot reach the target, can it defeat the protection on its path, and is enough damage left to produce the result you need? Improving the answer to only one question may leave the others unresolved. A clearer shooting angle can be as valuable as a more expensive cartridge.
Action checklist
- Identify the body area you intend to hit and whether it is exposed.
- Account for the distance and anything between the muzzle and that area.
- Consider each relevant armor component rather than the carrier's name alone.
- Keep aiming and firing until the target's condition is clear; a chart cannot confirm the outcome of your shot.
Read damage, penetration, and armor damage separately
Flesh damage is the cartridge's baseline injury value. Penetration power governs its ability to get through protection. Armor damage contributes to how much protective durability an impact removes. They describe different parts of the interaction, so adding them into a single homemade score usually hides more than it reveals.
Penetration is not a percentage. A round with 40 penetration does not have a universal 40 percent chance to penetrate. Likewise, 50 percent armor damage does not mean that one hit removes half of any vest's durability. The ammunition must be evaluated against a particular protective component, including its class and condition.
Secondary statistics matter once the cartridge has a suitable role. Velocity affects flight; recoil and accuracy modifiers can change how easily you place follow-up shots. Bleed modifiers describe another possible consequence of a hit, but a possible bleed should not substitute for reliable immediate damage when an opponent is already returning fire.
| Statistic | What it helps answer | Common reading error |
|---|---|---|
| Flesh damage | How much baseline injury can a projectile cause? | Assuming the listed value reaches the body through every obstacle |
| Penetration power | How well can this round challenge the relevant armor? | Reading the number as a percentage or guaranteed armor class |
| Armor damage % | How strongly does this round contribute to durability loss? | Treating it as direct health damage or a fixed fraction of a plate |
| Projectile speed | What flight behavior should I expect? | Assuming speed alone ranks armor penetration |
| Projectile count | How many separate projectiles leave this cartridge? | Assigning the entire shell's potential damage to every pellet |
Penetration versus armor class: a probability, not a lock and key
The community ballistics reference describes penetration chance as a function of the round's penetration power, the armor's class, and its remaining durability percentage. A successful roll lets the projectile pass that component. An unsuccessful one stops it there. Because the calculation is probabilistic, a favorable matchup is not the same as an unconditional promise.
The familiar shortcut of comparing penetration with armor class multiplied by ten is useful only for an initial scan. Around 40 penetration is a reason to investigate class 4 performance, not proof that every class 4 hit will pass cleanly. A small improvement can matter when a cartridge sits near the difficult part of a matchup. Read the actual class column or use a calculator that supports the current armor system before making a precise claim.
Higher penetration is especially valuable when your first hit must matter: a bolt-action shot, a brief view of a moving target, or a narrow opportunity before someone reaches cover. Sustained automatic fire gives later rounds opportunities to encounter weakened armor, but only if enough shots connect. A magazine that could eventually break a plate in a controlled test may still be a poor choice for a short, exposed duel.
Use the armor you are likely to face as a planning assumption, then adjust to what the encounter presents. You rarely know an opponent's exact plate or remaining durability before firing. Build in some margin instead of selecting ammunition that needs the target to be wearing the weakest possible version of the visible carrier.
Read the ammo chart's 0–6 scale correctly
The Wiki's effectiveness scale compresses armor interaction into seven comparison bands. Its numerical ranges describe the average number of bullets stopped by armor, not bullets required to kill a character. That distinction matters: getting through protection and removing enough health are separate events.
A rating of 6 represents strong initial penetration performance, with the reference describing an initial chance above 80 percent. It does not mean six hits, six damage, or guaranteed success. A rating of 4 can become useful as impacts damage protection, but it does not promise that your fourth shot will kill. Different materials, layers, distances, and hit locations make a single universal count inappropriate.
Use the table to reject unsuitable matchups quickly. If a cartridge rates poorly against the protection you expect, decide whether you can reliably aim elsewhere. If you cannot, select another round or reconsider the engagement. For detailed comparisons, check what armor condition and projectile-hit assumptions the chart or simulator uses.
| Rating | Average bullets stopped in the Wiki's scale | How to use the band |
|---|---|---|
| 0 | 20+ | An impractical armor matchup for a normal exchange |
| 1 | 13–20 | Expect many ineffective early impacts |
| 2 | 9–13 | Requires prolonged connected fire to improve the situation |
| 3 | 5–9 | Limited early performance; armor wear becomes important |
| 4 | 3–5 | More workable as repeated impacts weaken protection |
| 5 | 1–3 | Strong performance, though some early shots can be stopped |
| 6 | Less than 1 | High initial penetration probability; still check damage afterward |
Inspect plates, soft armor, and coverage as separate components
A plate carrier can combine removable hard plates with built-in soft armor. Those components can have different protection classes, durability pools, and coverage. Describing the entire outfit as class 5 tells you little about a shot that misses its class 5 plate and encounters a different protected area.
Where the projectile's path intersects both layers, penetrating the plate does not automatically finish the armor interaction. The ballistics reference states that passing through armor reduces penetration power and damage, so the next layer encounters a changed projectile. Do not add a class 5 plate and class 3 backing together and call the result class 8. Their interaction is sequential, not arithmetic addition.
Coverage also works in the other direction: protection cannot help a body area it does not cover. Inspect the carrier and its installed components, including front, rear, and side slots where supported. Check the listed protected zones rather than deciding solely from the vest's visual bulk. Armor hitboxes have changed across updates, making old diagrams a poor basis for a precise aiming trick.
When buying or looting a carrier, establish what is actually installed. An impressive model name does not tell you whether its plates are present, whether they match, or whether the side facing the next threat is badly damaged. For a broader comparison of protection, mobility, and repair costs, see /guides/armor-guide.
Why penetration does not guarantee full damage
Armor can fail to stop a projectile while still reducing the damage it delivers. The cited ballistics model describes a reduction between zero and 40 percent on a penetrating armor interaction, depending on the matchup. That is not a fixed tax applied to every round, nor a reason to assume a layered target can lose no more than 40 percent overall.
Consider a deliberately simplified example: a projectile arrives with 50 damage, every shot penetrates, every impact lands on an initially healthy 85-HP PMC thorax, and there are no other reductions or healing. At full damage, two hits provide 100 damage. If the illustrative reduction is 20 percent on each hit, each provides 40 and two provide only 80. The apparent two-hit round now needs a third damaging hit in this example.
The example isolates one variable; it does not simulate an actual burst. Armor condition changes between impacts, penetration itself can fail, and a second protective layer can alter the result again. Hits spread across arms, stomach, and thorax do not all subtract from the same local health pool.
For ammunition near a damage threshold, ask how much margin remains after the likely interaction. A round that barely exceeds a healthy head's or thorax's HP on paper is more sensitive to damage loss than one with substantial surplus. This is why both penetration and damage belong in the final comparison.
| Illustrative reduction from 50 damage | Damage reaching the thorax per hit | Identical damaging hits to reach 85 HP |
|---|---|---|
| 0% | 50 | 2 |
| 20% | 40 | 3 |
| 40% | 30 | 3 |
Durability: compare with the original maximum
The remaining durability percentage used in the community penetration model is current durability divided by the component's original maximum. Repair can restore current points while reducing the maximum that item can now reach. Consequently, a repaired item displaying matching current and repairable values is not necessarily equivalent to a factory-fresh example.
Suppose a plate originally had 60 durability and now shows 45/45 after repair. For this comparison, 45 divided by 60 is 75 percent. Reading only the two matching numbers would suggest full condition and conceal the permanent loss. The class has not changed, but the component is less resistant than a fresh plate of the same model.
This is also why raw point totals are misleading across different plates. A small remaining number might be nearly full condition on one component and severe damage on another. Establish the original maximum before calling an item healthy or ruined, then examine its material and the ammunition it is expected to stop.
After a fight, inspect the component that took the hits. A fresh rear plate does not replenish a damaged front plate, and an apparently healthy carrier does not erase damage to an insert. If you expect another frontal exchange, evaluate that specific protection before deciding to continue deeper into the raid.
Armor damage and material determine how protection wears down
Repeated impacts can improve a weak round's chances by removing durability. The amount removed depends on more than its armor-damage percentage: the reference also includes penetration, armor class, and the material's destructibility. Two cartridges with similar flesh damage can therefore behave differently during sustained fire against the same plate.
Material destructibility describes how readily durability is lost. Lower values mean less durability loss from that part of the calculation. The snapshot lists ceramic at 0.6 and UHMWPE at 0.3375. Dividing durability by destructibility gives a comparison measure commonly called effective durability; it is useful for discussing wear, but it is not another armor class.
Using equal, hypothetical 60-point durability pools, ceramic gives 60 / 0.6 = 100 effective durability, while UHMWPE gives 60 / 0.3375, approximately 178. That does not establish that the second plate survives exactly 78 percent more shots. Penetration outcomes, class, and the minimum durability loss per impact remain relevant. Compare otherwise similar protection before drawing a practical conclusion.
For the shooter, the important question is whether you can land enough hits on the relevant component before the enemy fires back or breaks contact. Alternating between different armor zones may spread wear rather than concentrating it. For the wearer, material and repair behavior help determine the value of a plate over several raids, while class and coverage determine which threats it can meaningfully address in the first place.
Blocked rounds, blunt damage, and helmet ricochets
A stopped projectile can still cause blunt damage. This depends on the armor's blunt throughput and the ammunition matchup, with soft armor behind a hard component able to reduce the resulting blunt injury. Do not confuse this small health loss with the durability damage inflicted on the protective item. They are separate outcomes of the same impact.
Blunt damage is generally a poor foundation for a kill plan against strong armor. If your ammunition repeatedly fails to penetrate, continuing to shoot the plate requires time and connected impacts. A usable exposed target or a new angle is often a better opportunity than hoping small amounts of blunt injury will settle the fight.
Helmets introduce ricochet as a separate consideration. The reference describes it as dependent on impact angle and the helmet's ricochet properties. A ricochet can explain survival even when the incoming cartridge has ample penetration for the helmet's class. A qualitative label such as high ricochet chance should not be read as a universal percentage applying to every hit.
Inspect helmet shell, face shield, and additional protection individually. Their coverage and classes can differ. An uncovered face does not inherit the shell's protection, and an expensive helmet does not make every head hit equivalent. The body's armor-penetration calculation also does not grant a tank-style sloped-armor bonus simply because you turn your torso. Turning can change what is hit; that is a different issue.
Hit location connects ballistics to the health system
A standard PMC has separate health pools, including 35 HP in the head and 85 HP in the thorax. Direct damage that destroys either vital part is lethal under normal conditions. The total 440-HP figure therefore does not mean you must deal 440 damage to kill with accurate head or chest hits. Bosses and other AI profiles can have different health, so do not transfer a PMC calculation to every enemy.
Arm and leg hits have another consequence. After a limb is destroyed, further damage can be distributed through the remaining body according to the health system's rules. This is what makes repeated hits to exposed legs a viable strategy with suitable flesh-damage ammunition. It is not accurately modeled by dividing total HP by the cartridge's listed damage and rounding up.
The practical limitation is access. Legs can be hidden behind a car, a wall, or a raised floor edge even when the opponent's head and chest are visible. Choosing a leg-focused round commits you to finding angles where its preferred target exists. If you repeatedly take chest-only fights, the loadout and the engagement plan are working against each other.
Avoid treating every nonlethal hit as wasted. An injured arm or leg can affect an opponent's actions, but it does not establish how close their vital parts are to destruction. Maintain a clear aiming plan rather than moving the reticle between body parts because one initial hit failed to end the encounter.
One caliber, different jobs: 9x19 RIP versus PBP
The contrast between 9x19 RIP and 9x19 PBP gzh shows why caliber alone cannot describe performance. In the reference snapshot, RIP has 102 damage and 2 penetration; PBP has 44 damage and 39 penetration. Loading the same compatible weapon with the other cartridge changes which shots you should seek.
RIP's appeal is exposed flesh. Its large damage value does not turn a chest plate into a sensible primary target. If you choose it for leg shots, pick positions where you can see and track legs through the engagement, and consider what happens if the target retreats behind waist-high cover. The route and firing position are part of the ammunition choice.
PBP trades much of that flesh damage for a stronger armor matchup. It offers more flexibility when the shot you have is against protected torso or head areas, but 39 penetration still does not erase every class of protection. Against strong plates, its damage and penetration must be judged together with the number of accurate follow-ups your weapon and position allow.
For a player still learning to control aim under pressure, consistency is valuable. Pick one purpose for the loadout and practice it. Switching between two radically different cartridge roles without changing your aiming habits can make both feel unreliable. The broader caliber guide at /guides/best-ammo-by-caliber helps compare alternatives once you know the role you need.
| 9x19 cartridge | Snapshot damage / penetration / armor damage % | Intended comparison |
|---|---|---|
| RIP | 102 / 2 / 11 | High flesh damage with extremely limited armor penetration |
| PBP gzh | 44 / 39 / 55 | Much stronger penetration with lower baseline flesh damage |
Shotguns: count projectiles that connect
Multi-projectile shells require a different reading of the damage column. The snapshot's 12/70 flechette contains eight projectiles, each with 25 damage and 31 penetration. Eight multiplied by 25 gives 200 potential base damage across the full shell. It does not give each projectile 200 damage, and it does not turn the shell into one bullet with eight times the penetration.
Each projectile follows its own impact path. Some can hit armor, some can strike a different body part, and some can miss entirely. A close grouping centered on a target and a distant spread clipping one shoulder are not comparable outcomes, even though both consume one shell. Chart notes that assume every projectile connects are especially important here.
The reference also describes a minimum of one durability point lost for an individual armor impact, including individual pellets. This helps explain why repeated multi-projectile hits can wear protection down. It does not mean that firing one shell automatically deducts its projectile count from the front plate: those projectiles must actually hit that component.
Test the pattern with the shotgun, barrel, and shell you intend to carry. Begin at the distances you expect to fight, then move farther back until too much of the spread leaves the intended area. That observation tells you more about a usable engagement distance than adding up the theoretical shell damage. For a conventional single-projectile slug, return to the usual damage-versus-penetration comparison; a large damage number alone still cannot solve a poor armor matchup.
Range changes damage, penetration, and the shot you must aim
Tarkov models projectile travel rather than applying every hit instantly. Gravity affects the trajectory, while air resistance reduces speed. The community reference states that damage and penetration also decline as a bullet loses speed over distance. A cartridge's familiar close-range performance is therefore a starting point for a long shot, not a complete description of it.
Three separate problems emerge at range. You must account for vertical impact position, give a moving target an appropriate lead, and retain enough terminal performance to achieve the intended result. Faster initial velocity can make the first two easier in a particular comparison, but speed by itself does not replace the round's damage and penetration statistics.
Be especially careful with cartridges whose starting damage sits close to a relevant health threshold. Small losses can matter even before a helmet or intervening object enters the calculation. There is no useful universal rule that every cartridge loses the same amount per hundred meters. Use a current ballistic reference or test the specific weapon-ammunition combination instead of inventing a linear falloff.
Practice with a consistent load and optic. Check the impact point at known distances before relying on the selected sight zero, and repeat when a substantial ammunition or weapon configuration change alters your setup. At very close distances, remember that the optic sits above the bore: a clear sight picture over an obstacle does not always mean the muzzle has an equally clear path.
Cover and intervening body parts complicate a clean hit
The world between you and the target matters. The ballistics reference allows projectiles to penetrate or ricochet from objects according to the object material and projectile. Do not assume that every visually thin door, pane, railing, or sheet of metal behaves identically. Visibility through or around a surface is not proof of an unobstructed shot.
A bullet can also interact with more than one body part. An opponent holding a weapon can put an arm in front of the chest you are aiming at. Consequently, a reticle that appears centered on the torso does not prove that the thorax received the original listed damage. Avoid assigning a fixed damage or penetration loss to an arm without testing the relevant version and setup.
When an opening is available, prioritize a clear path to your intended target over a speculative shot through additional material. If you deliberately fire through cover, expect more uncertainty about impact and terminal performance. Do not convert a successful attempt against one object into a claim that the same ammunition passes every similar-looking object.
This is also a useful replay habit: trace the path from muzzle to target, not just the reticle's final position. Check nearby cover, the opponent's pose, and whether the visible area changed during the burst before blaming the cartridge.
Build an ammunition budget that survives the first magazine
Choose a cartridge you can supply for the encounters you plan to take, then select a controllable compatible weapon. Spending most of the kit budget on attachments while compromising the ammunition's core job leaves a handling improvement attached to the wrong projectile. Conversely, buying premium rounds for a weapon you cannot keep on target wastes their advantage.
Plan beyond the magazine initially loaded into the weapon. Count the ammunition in spare magazines and the loose rounds intended for repacking. If your effective supply is exhausted after one exchange, decide in advance whether to leave, avoid further fights, or accept a different aiming plan. An ammunition budget is partly a decision about how long you intend to remain combat-capable.
Putting stronger rounds at the top of a magazine can ration a limited stock, but it introduces a transition in performance. The rounds that feed first are at the top, so load the lower portion before adding the preferred opening rounds when assembling it manually. Confirm the finished order and the cartridge already in the chamber. After partial use and repacking, do not assume the original pattern still exists.
For learning, a uniform magazine is easier to interpret: you know which round produced each shot and do not need to count down to a change in capability mid-fight. If you do mix ammunition, use a simple, deliberate pattern and keep spare magazines recognizable. Avoid a complicated alternating sequence whose purpose you cannot explain in terms of the target you expect.
Turn the mechanics into an engagement decision
Imagine meeting a geared opponent across a short corridor with a low-penetration flesh load. The opponent's chest is the largest visible target, but size alone does not make it the most productive one. If exposed legs are trackable, they fit the loadout's purpose. If cover hides them, consider an available unprotected head area, a new angle, or disengagement instead of assuming a full magazine will solve the plate.
Now consider an armor-focused rifle against a target briefly crossing a doorway. A strong initial penetration matchup is useful because you may have only a few hits before the target disappears. Firing earlier into a doorframe adds an obstacle to an already short opportunity. Waiting for a clear shot can improve the value of the ammunition you brought.
At longer range, the question changes again. A steady view of the head may be preferable to a small number of uncertain chest hits, but only if you can place the shot and retain enough damage against the relevant protection. There is no requirement to take every visible target. The information you lack should affect whether you start the fight, especially when your task does not require that kill.
| Situation | Priority | Useful adjustment |
|---|---|---|
| Low penetration against a strong visible carrier | Find a productive exposed target | Change angle or decline the frontal plate exchange |
| Strong penetration with low flesh damage | Keep damaging hits concentrated | Maintain aim and leave time for a follow-up |
| Shotgun spread no longer fits the target area | Increase the number of connecting projectiles | Close distance using cover or choose another engagement |
| Long shot near a damage threshold | Verify trajectory and retained performance | Use a tested setup and avoid extra intervening material |
| Very limited supply of suitable rounds | Preserve the loadout's intended capability | Set an extraction or resupply point before reserves run out |
Diagnose a surviving target without guessing
A high damage total or hit count after a raid cannot reconstruct every shot by itself. Your shots may have involved several enemies, different body parts, armor impacts, and opportunities for healing. Damage absorbed by armor is not a direct readout of durability points removed, and an overall hit count does not establish repeated penetrations into one thorax.
Start with the variables you can verify. Check the exact cartridge, including its caliber and suffix; similar abbreviations are used across different ammunition families. Establish which magazine and chambered round were in use. Then review the visible hit area, distance, and any obstacles. An ammunition chart is only useful when you are looking up the round you actually fired.
If footage remains ambiguous, keep the conclusion narrow. You can identify a poor armor matchup or an obstructed shot without claiming to know the opponent's precise health, plate condition, or server-side result. One unusual survival is a reason to inspect the evidence, not enough evidence to calculate a new penetration rule.
Action checklist
- Confirm the full round name and the ammunition remaining in the used magazine.
- Separate confirmed impacts from muzzle flashes and shots that merely looked on target.
- Check whether the intended vital area was screened by an arm or scenery.
- Consider plate coverage, other armor layers, and distance before calculating damage.
- Use repeatable observations to change the loadout; leave uncertain outcomes marked uncertain.
Practice the variables you can control
Use a practice setting appropriate to your account to learn the weapon-ammunition combination without changing everything at once. First establish where individual shots land at known distances. Then practice short strings on one intended body-sized area. For a shotgun, observe how much of the pattern remains inside that area as distance increases.
Keep the cartridge, weapon configuration, optic, stance, and distance consistent while assessing one change. A new optic, a different round, and a different firing distance introduced together make it difficult to identify the cause of a better or worse result. Record a small amount of useful information: the setup, distance, impact offset, and whether you could keep follow-ups where you intended.
A target board can teach placement, grouping, and spread. It cannot establish how many shots a particular worn plate and soft-armor combination will stop. If you use a community armor simulator, inspect its version and assumptions, including layers, durability, and distance. If you perform a controlled armor comparison, reset the target's health and protection between trials; otherwise each attempt tests a different condition.
Before the next raid, use /tools/ammo-chart to compare the exact round, verify the loaded magazines, and choose the shot you are trying to create. The goal is a loadout whose behavior you understand well enough to recognize a good opportunity when it appears.
Action checklist
- Name the loadout's primary target: protected torso, exposed flesh, or a precise headshot.
- Check the ammunition's dated stats and its relevant armor matchup.
- Test aim and follow-up control at the distances the route is likely to produce.
- Inspect your own plates and helmet coverage before deploying.
- Carry enough suitable ammunition for the planned raid and know when to leave.
Avoid these mistakes
- Equating flesh damage with armor performance.
- Reading effectiveness as an exact probability.
- Treating a caliber name as a specific cartridge.
Source ledger
- Escape from Tarkov — official game websiteOfficial
Official game and developer reference. Numerical ballistics and armor mechanics in this article are attributed to the community references below, not to the product page.
- Ballistics — Escape from Tarkov WikiReference
Community mechanics reference for projectile flight, penetration inputs, sequential armor layers, penetrating and blunt damage, original-maximum durability, material destructibility, ricochet, and the 0–6 scale. The site's September 8, 2026 captured reference supplies the numerical baseline; calculations and tactical examples are this guide's illustrations.
- Armor plates — Escape from Tarkov WikiReference
Separate plate classes, durability, materials, protected areas, and compatibility with carriers. Supports checking installed components individually.
- Armor vests — Escape from Tarkov WikiReference
Carrier protection and coverage information. Supports distinguishing built-in protection from removable plates rather than assigning one class to the whole outfit.
- Helmets — Escape from Tarkov WikiReference
Helmet class, coverage, durability, and ricochet context. Helmet attachments and face protection must be assessed separately from the shell.
- Health system — Escape from Tarkov WikiReference
Body-part damage, vital-part destruction, and damage distribution after limb destruction. The 35-HP head and 85-HP thorax examples refer to the standard PMC baseline, not every AI health profile.
- 9x19mm RIP — Escape from Tarkov WikiReference
Named flesh-ammunition example: 102 damage, 2 penetration, and 11 percent armor damage in the reference snapshot. Trader availability and market prices are not assumed.
- 9x19mm PBP gzh — Escape from Tarkov WikiReference
Named penetration-focused comparison: 44 damage, 39 penetration, and 55 percent armor damage in the site's snapshot and the Ballistics chart. These values do not imply guaranteed penetration of every plate.
- 12/70 flechette — Escape from Tarkov WikiReference
Shotgun example with eight projectiles, 25 damage per projectile, and 31 penetration. The 200-damage shell total is simple base-value arithmetic before misses or damage reductions.
- Leg meta — Escape from Tarkov WikiReference
Background for deliberately targeting exposed legs with high flesh-damage ammunition. Positioning advice and engagement decisions are the guide's practical recommendations.
- Weapon mods — Escape from Tarkov WikiReference
Weapon-component modifiers and sight zeroing settings provide context for testing a consistent weapon, ammunition, and optic configuration.
Frequently asked questions
Does 40 penetration guarantee that a round penetrates class 4 armor?
No. Comparing penetration with ten times the armor class is a rough screening shortcut. The actual chance depends on the ammunition and the specific component's class and remaining durability, with additional layers potentially creating further interactions.
Does armor damage of 50 mean I remove half the armor with each hit?
No. Armor damage is an input to durability loss, alongside other factors such as penetration, armor class, and material. It is neither a fixed percentage of the whole item's durability nor direct damage to the wearer.
Why did a round penetrate without killing in the expected number of hits?
The listed flesh damage may have been reduced by distance, armor, or an earlier interaction, and not every impact necessarily damaged the same body part. Passing one plate also does not establish that the projectile passed every protective layer behind it.
Is a repaired 45/45 plate as protective as a new one?
Only matching displayed numbers is insufficient. Compare current durability with that plate model's original maximum. If it originally had 60 points, 45 current points represent 75 percent of its original durability in the cited penetration model.
Can high-damage ammunition still kill someone wearing excellent armor?
Yes, if you apply it to a suitable exposed area. Repeated leg hits are one option, but the tactic depends on seeing and tracking the legs. Strong armor does not protect every body area, while a poor penetration matchup remains a poor choice for deliberate plate hits.
Does better penetration always make a round the best choice?
No. It helps against armor, but flesh damage, retained performance at range, handling, and available supply still affect the decision. Choose enough penetration for the intended threat, then compare the remaining tradeoffs.
Does an eight-projectile shell apply its full listed total damage to every hit?
No. Its projectiles are separate. The full base total assumes all eight connect before considering armor and other reductions. Spread, intervening cover, and different hit locations can leave much less useful damage on the intended area.
Should I rely on a fragmentation chance shown in an older ammo chart?
Do not add an assumed fragmentation bonus to your required damage. A displayed or historical probability alone does not verify how the current implementation behaves. Compare baseline performance and use version-specific testing before depending on a bonus effect.
Will an expensive weapon make cheap ammunition penetrate better?
Price and attachments do not directly upgrade a cartridge's listed penetration. Weapon configuration can affect handling and ballistic behavior, but it does not convert a low-penetration flesh round into an armor-focused load. Start with suitable ammunition and a platform you can control.